This is such a cute, quick tiny little heart!
It finishes at 2.5 inches square. It is tiny, and so, so cute! This tiny heart quilt block finishes up really fast, so you could make a whole bunch for Valentine's Day gifts. You could sew them up in wedding colors and include them in wedding favors! Or, you could put a whole bunch together to make an adorable mini quilt wall hanging. If you have some scrap fabric, this is perfect for using that up!
If you want to quilt and bind it like I did (click here to read a post on doing that), you'll also need some batting, backing and binding fabric. I used a piece of batting that was about 4 inches square. My backing fabric was the same size. The binding I cut at 2.5 inches by about 14 inches (but then I had to cut a couple inches off at the end, so I think 12 inches will be about perfect).

To make the block itself, you will need two colors of fabric, one for the heart and one for that background. Here's what you need to cut:
Two 1.5 inch squares from both fabrics
One 2 inch square from both fabrics
One 2.5 inch by 1 inch rectangle from just the heart fabric.
You can set the rectangle aside once those are cut, we'll need to turn the squares into half square triangles first.


Start by matching up a background square with a heart square. Make sure to match the sizes (2 inch with 2 inch, 1.5 inch with 1.5 inch). Put them right sides together and align all raw edges.
Draw a line from one corner to the other. Sew a quarter inch from this line on both sides (so you will have two lines of stitching). Then cut along the line you drew.
Open up the new squares you've created and press the seam to one side. I like to press the seams to opposite sides. Then I can "nest" the seams when I sew them, which both reduces bulk in the seam and helps get a nice crisp corner.

Trim the squares you've created. You'll trim that squares that started at 1.5 inches to 1 inch and the squares that started at 2 inches to 1.5 inches.

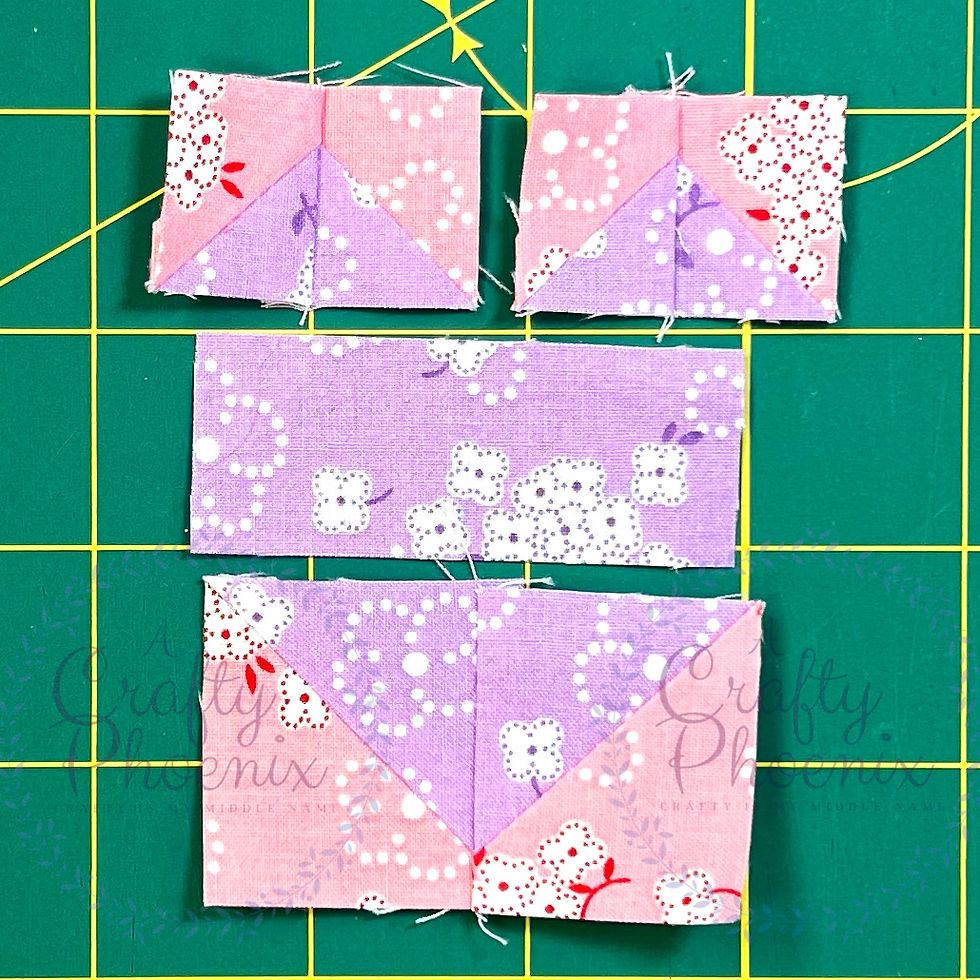
Now the fun part! Lay out all your cut pieces as shown. The 1 inch half square triangles go on top of the rectangle, and the 1.5 inch half square triangles go underneath.

I start by sewing the half square triangles together. Use a quarter inch seam allowance again!
Also, remember how I pressed the seams in opposite directions? If you also did that, make sure to match those top half square triangles up so you can nest them together.

Next, I sew the bottom half square triangles to the rectangle and finish sewing the top half square triangles together.

And then the block is done! I know, it looks kind of wonky with that rectangle sticking out in the middle, but once it's finished, it will look so cute. Find the part 2 on finishing this block up by clicking here!
If you are interested in seeing some of my other blocks, including a Valentine's Day block that uses these adorable little hearts, check out my Etsy shop by clicking here!
Did you make this block? I'd love see it! Post your pictures or any questions in the comments!


Comments